Simple, step-by-step instructions for installing HDPE fence stays
Installing Stay N Graze fence stays is straightforward. No special tools required — just your stays, the included install wire, and a pair of pliers.
No Special Tools
Wire Included
5 Simple Steps
Start with your barbed wire or smooth wire already strung between posts at proper spacing. The wires should be tensioned and attached to your fence posts before installing stays.
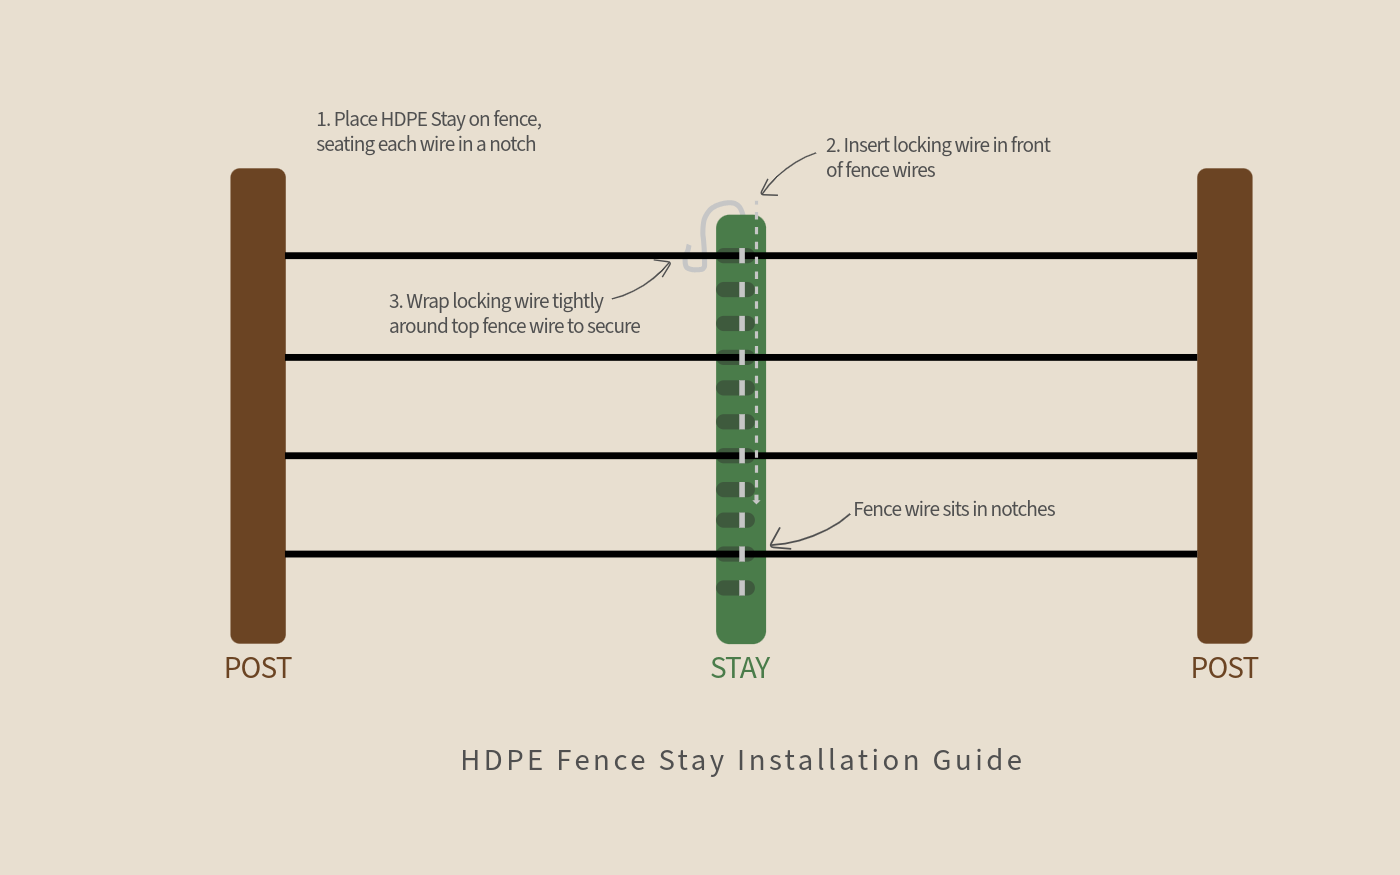
Place the HDPE stay onto the fence so that each horizontal wire lines up with the closest notch on the stay.
Take the included galvanized installation wire and thread it between:
The install wire should run vertically along the stay, catching each horizontal fence wire.
Using pliers, tighten the install wire. Twist the wire ends to secure them firmly. The stay should now be locked in place against the fence wires.
Continue installing stays at regular intervals along your fence. Typically one or two stays between each post, or as needed based on terrain and fence conditions.
Install one or two stays between each post for standard fencing. Use more stays in rough terrain or high-pressure areas.
Make sure your fence wires are properly tensioned before installing stays. Loose wires make installation harder.
Each fence wire should rest in the center of its notch. If spacing doesn't match, adjust the stay position up or down.
HDPE stays can be installed in any weather. Unlike wood, they won't absorb moisture or change size with temperature.
Order your HDPE fence stays today and start improving your fence lines.